An audio interface is the device you will need to get audio from your source (likely your voice) to your computer and, ultimately, your recording software (commonly known as a ‘digital audio workstation’ or ‘DAW’).
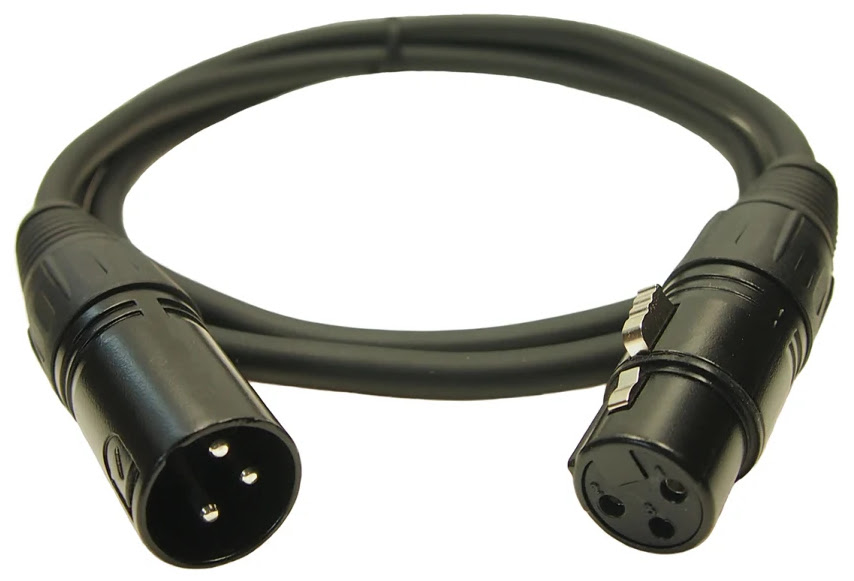
But before we dive into interfaces, let’s have a brief chat about microphones. There are generally two types of connections on microphones, either a USB cable or what we audio folk refer to as an XLR connector that requires an XLR cable, which looks like this:

It has a female connector (which goes to your microphone) and a male connector that you plug into your interface. If you’re using a USB microphone, it just plugs directly into a USB port on your computer and is also the interface for recording into your DAW (NOTE: Most USB microphones [e.g. the Blue Yeti] are not acceptable for professional voiceover work!). If using a professional USB microphone like the Rode NT1 5th Gen, go ahead and skip down to the part where I talk about setting a proper recording level via your microphone.
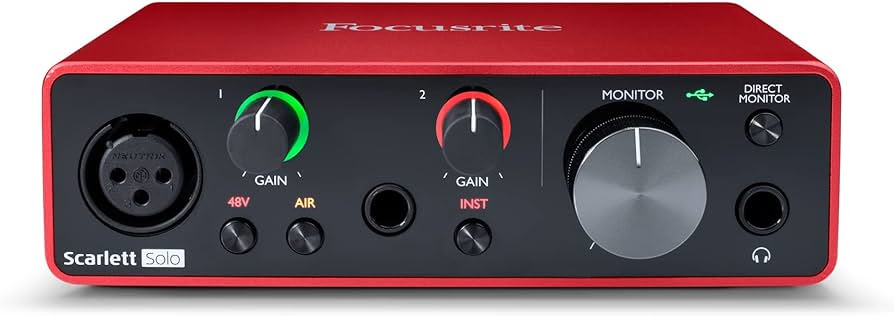
We’re going to stick with a standard XLR-connected microphone, so let’s circle back to audio interfaces. A typical audio interface is a small box with a port to connect your microphone, a port to connect to your computer (often USB), and ports to connect to speakers and headphones. Here’s a pic of the simple and well-regarded Focusrite Scarlett Solo.

In addition to the ports on the interface, you will find knob(s) typically labeled “Gain” that allow you to turn your microphone’s level up or down as well as a similar knob for the speakers and/or headphones. And finally (and most important) you will find, either on the front or the back, a button usually labeled “+48v.” This is the ‘phantom power’ button and is required in order to power condenser microphones. *IMPORTANT* – If you have a condenser microphone, the phantom power button should only be turned on AFTER you plug your microphone in, and you should never unplug your microphone before turning phantom power off!
Now that you have your microphone plugged in and phantom power turned on, it’s time to fire up your software and check your recording levels prior to recording. I’m going to assume for the sake of this article that you know how to assign your interface to your software. If you don’t, check in the DAW software’s Preferences menu where you will be looking for a selection typically labeled “Devices.” This menu selection will list your interface and allow you to select it as the recording source.
Usually a DAW allows you to check levels prior to hitting the record button by using what is called “input monitoring” (we’re monitoring the input!). In Audacity you simply click on the numbered meter next to the microphone. In TwistedWave there is a menu selection under “Audio” called “Check Input Levels.”
Ideally you want to turn up the ‘gain’ knob on your interface until the peak level eyeball averages between -6 and -9 but never hits 0. Again, this is an eyeballed average, there is no specific “black and white” answer to how loud you should record (other than not hitting 0 which will cause your audio to distort). Also important to note that several DAWs (Audacity, Ocenaudio, Adobe Audition, TwistedWave) use a “traffic light” color scheme on their meters (green to yellow to red), and this is often problematic for new recordists. Why? The yellow comes on just when your levels are getting to where they need to be and the red comes on before your recording is too loud; the “traffic light” setup subconsciously causes your brain to think your recording level is good when it is actually too low, so you need to ignore the traffic light and ensure you are recording loud enough via the numbers on the meter.
That is all for connecting your microphone to your interface and recording at a proper level within your DAW (digital audio workstation). Go forth and create!